We provide customers Multi Brand with Header Ecommerce used by big brands, bringing high aesthetics and logic. You can check this demo (pass: 4) to know how E-commerce header works.
The Section Header is designed as a powerful and flexible tool that serves as the first point of user interaction on the website. The modular architecture allows for a high level of customization, from managing logos and main navigation links to integrating important functions such as search bars, shopping carts and user accounts.
The Header Ecommerce is a professional header and also requires more customization than other headers. However, you do not need to worry about this problem, we will guide you in detail so that you can create it.
In this guide, if you have 3 brand pages: WOMEN, MEN and KIDS. The WOMEN brand is homepage by default. Let's stick on the steps to build it:
First, you add the section "Header Ecommerce" in "Header Group", and hide or remove another Header section.
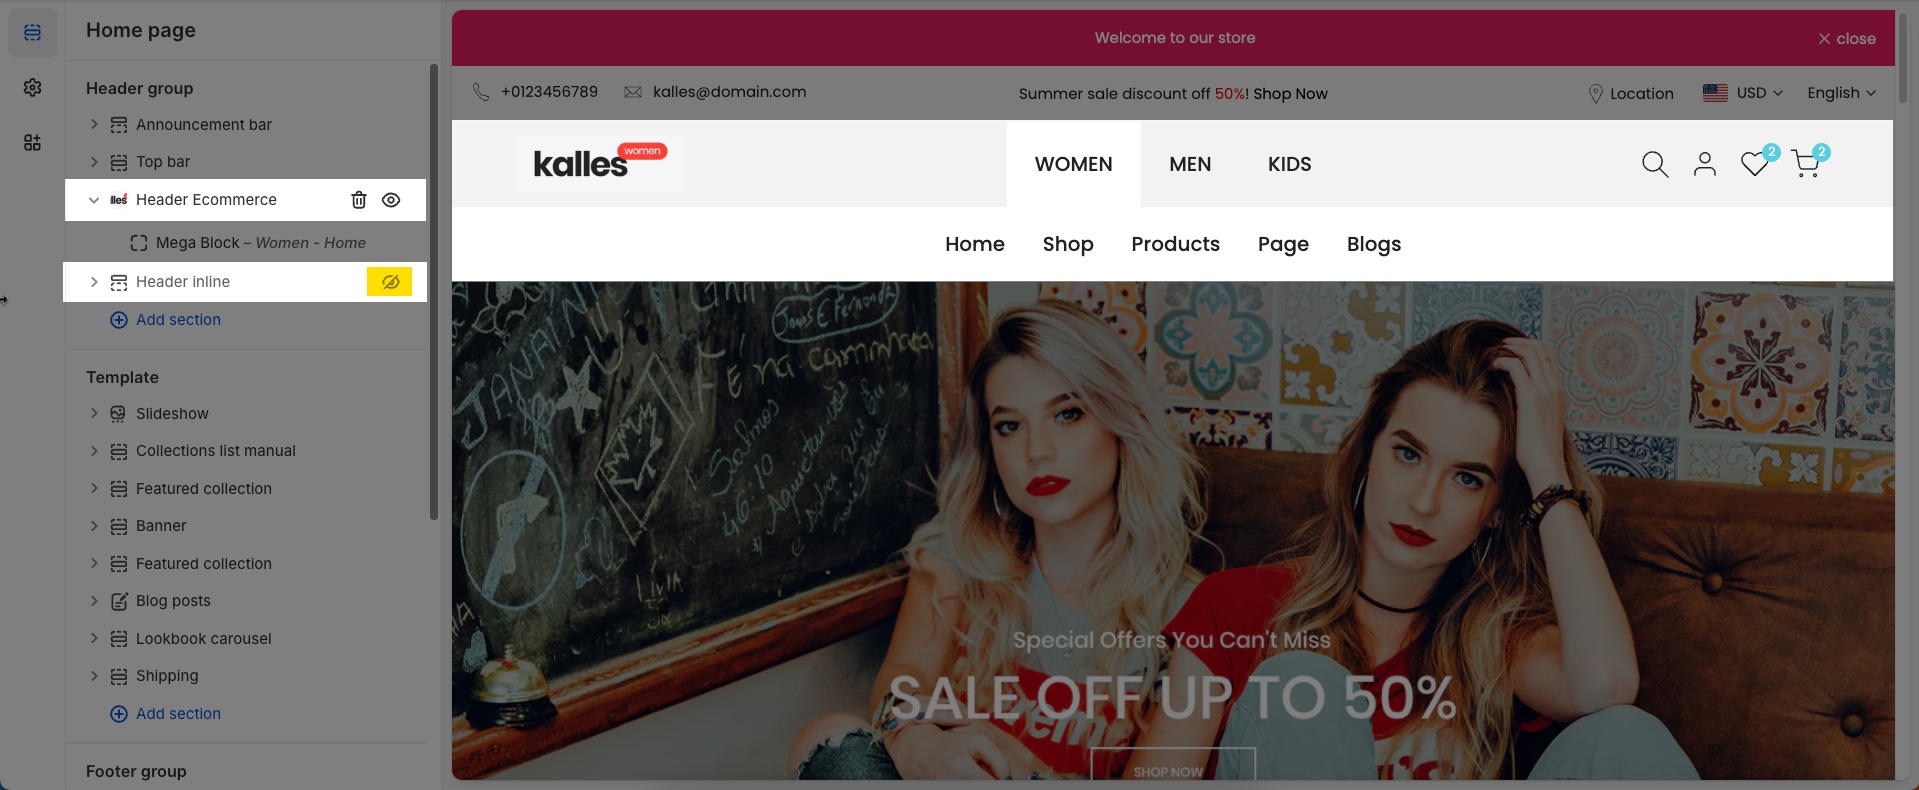
Note: No need to create a page for WOMEN (default homepage).
For each Brand Menu you want to show on the Main Header, you create a template. Follow this video:
Go to Online Store > Pages > create the new pages and assign them to the corresponding template:
Go to Theme Customize> Pages > choose "Men", "Kids" pages to edit.
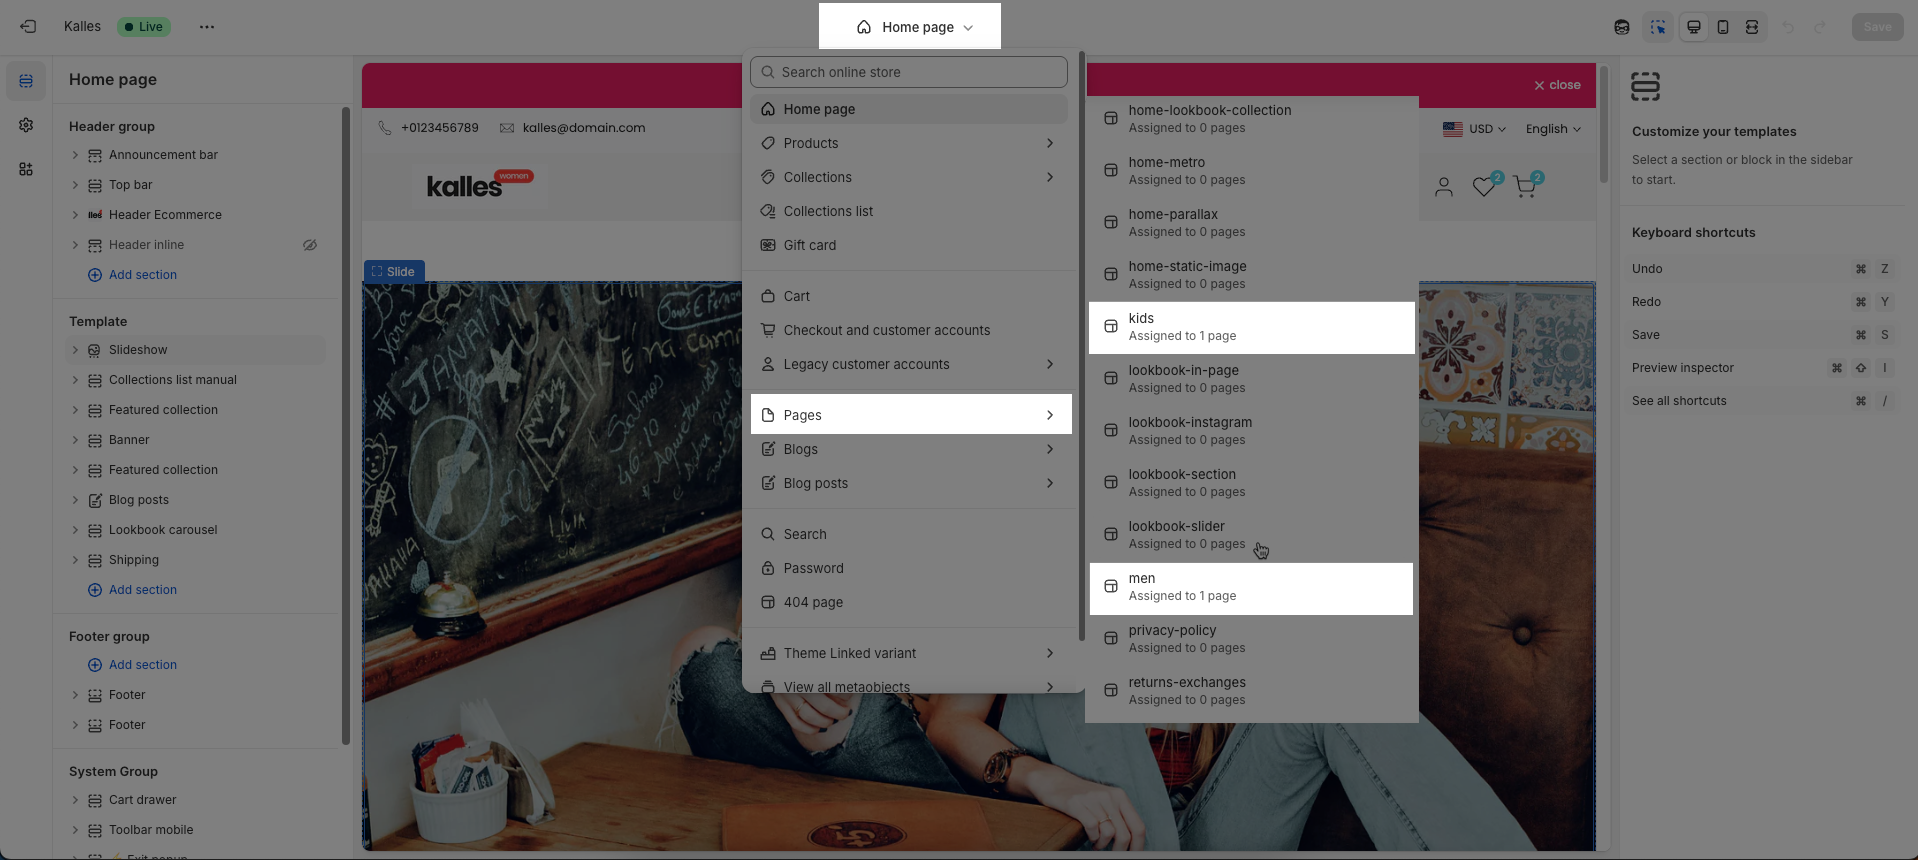
Important: In the "Header brands Kalles" Navigation, a URL cannot be in two brands. For example, if you put the "Collection/All" page under both WOMEN and MEN brands, the WOMEN brand will be activated when you access "Collection/All
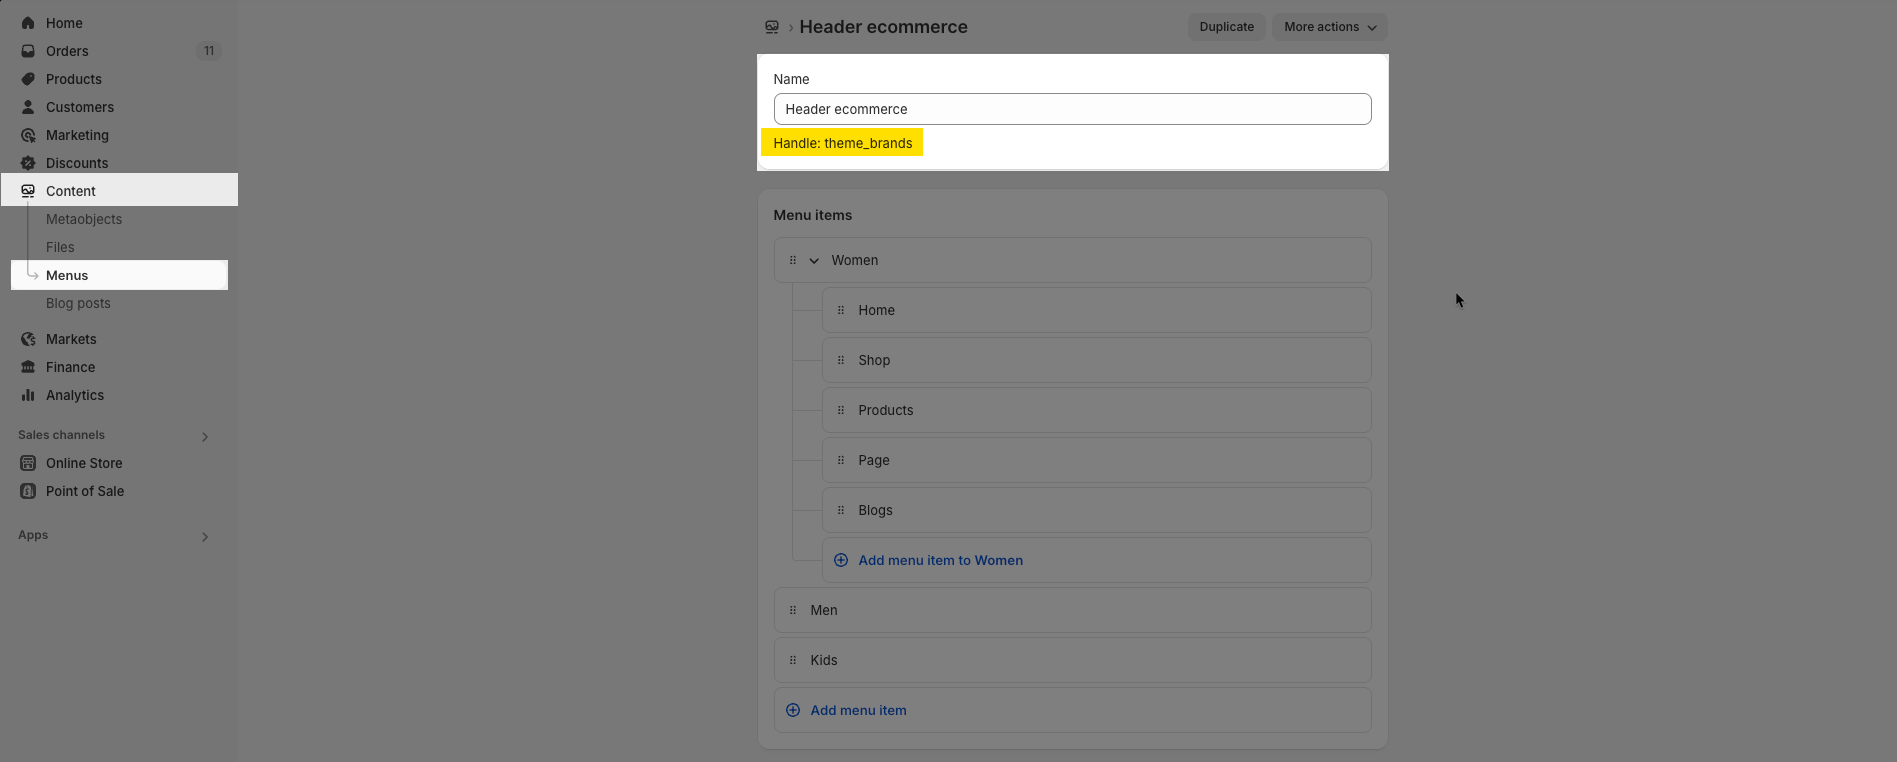
Go to Shopify admin > Content > Menus to create a navigation for the header menu.
Name: Header Ecommerce (or any name you want)
Required handle: theme_brands
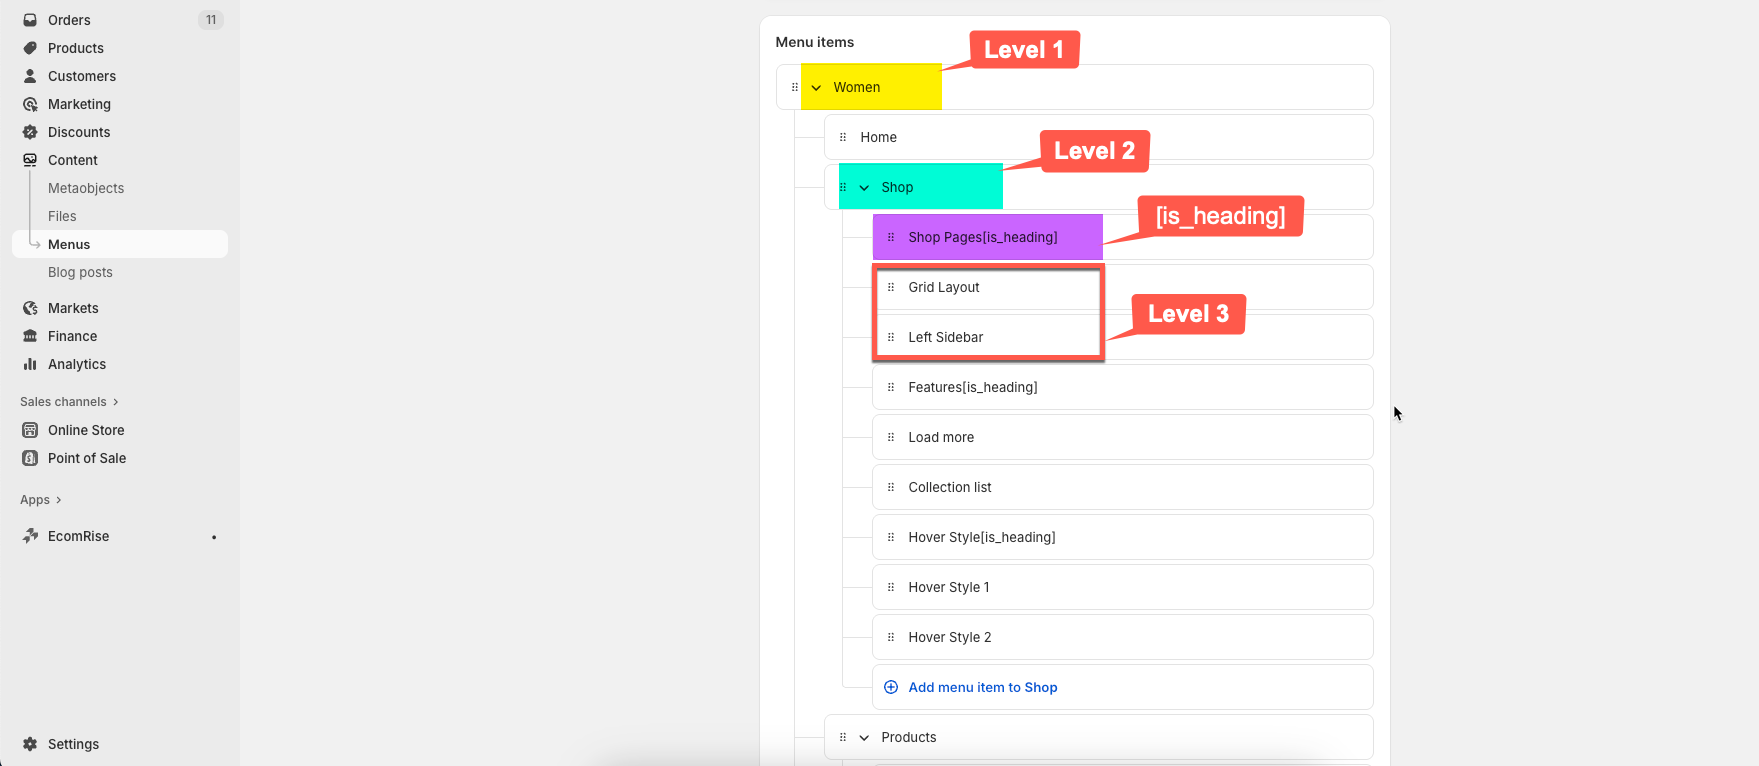
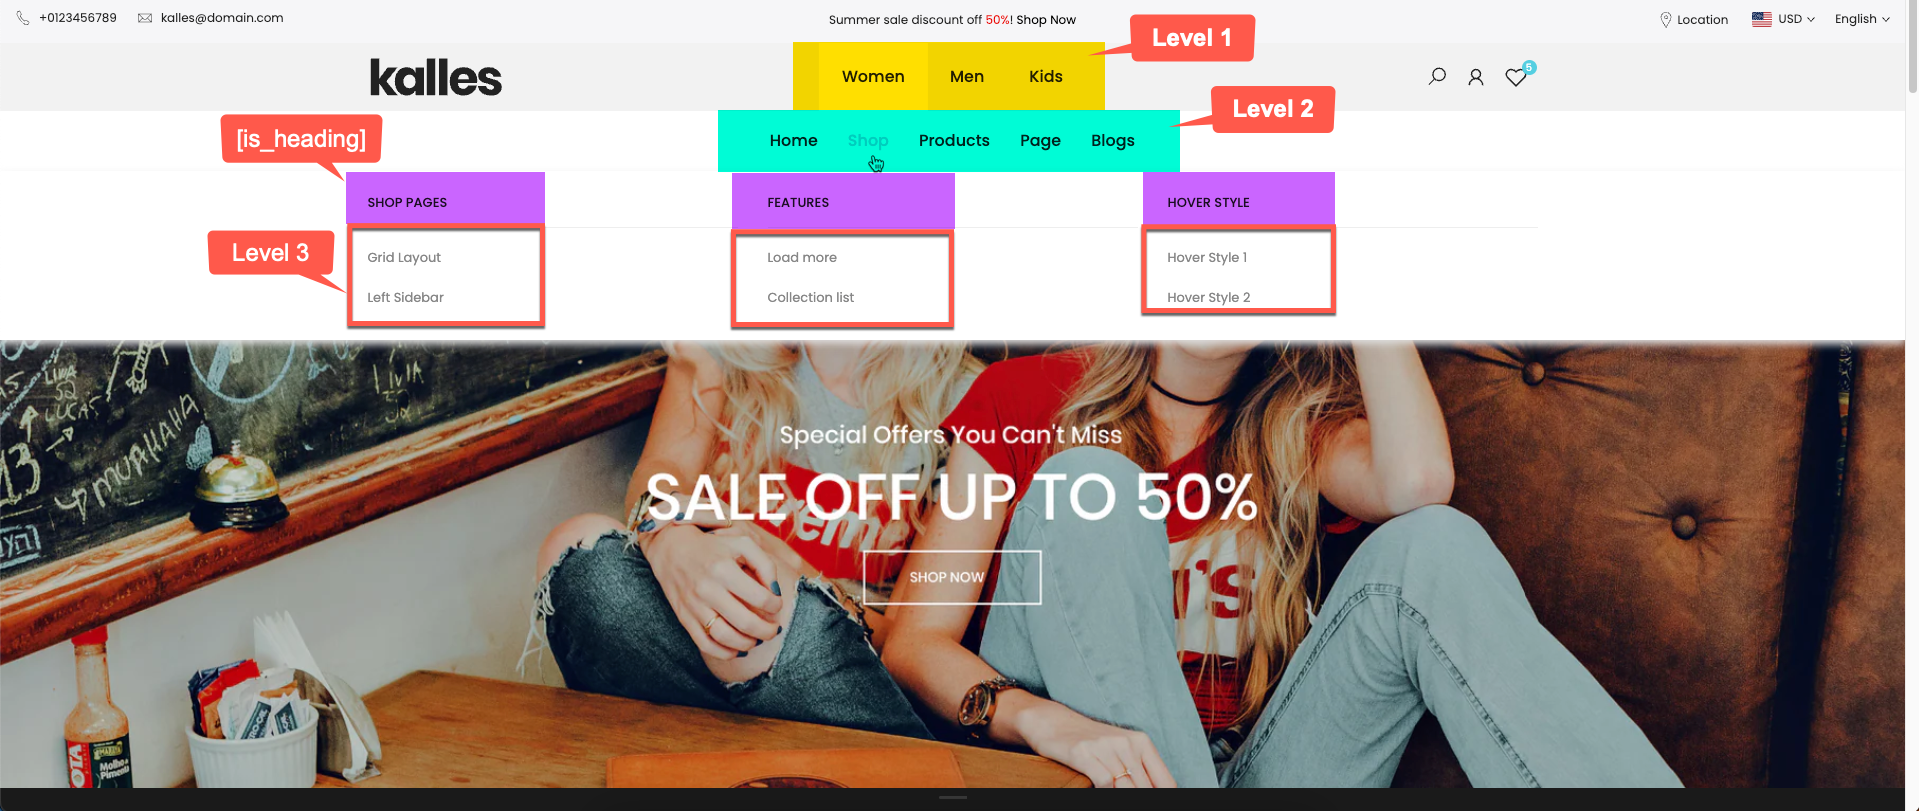
In Header Ecommerce, you need to follow the structure:
Level 1: Brand pages (Women, Men, Kids)
Level 2: Menus for each brand
Level 3: [is_heading] and Linklist items
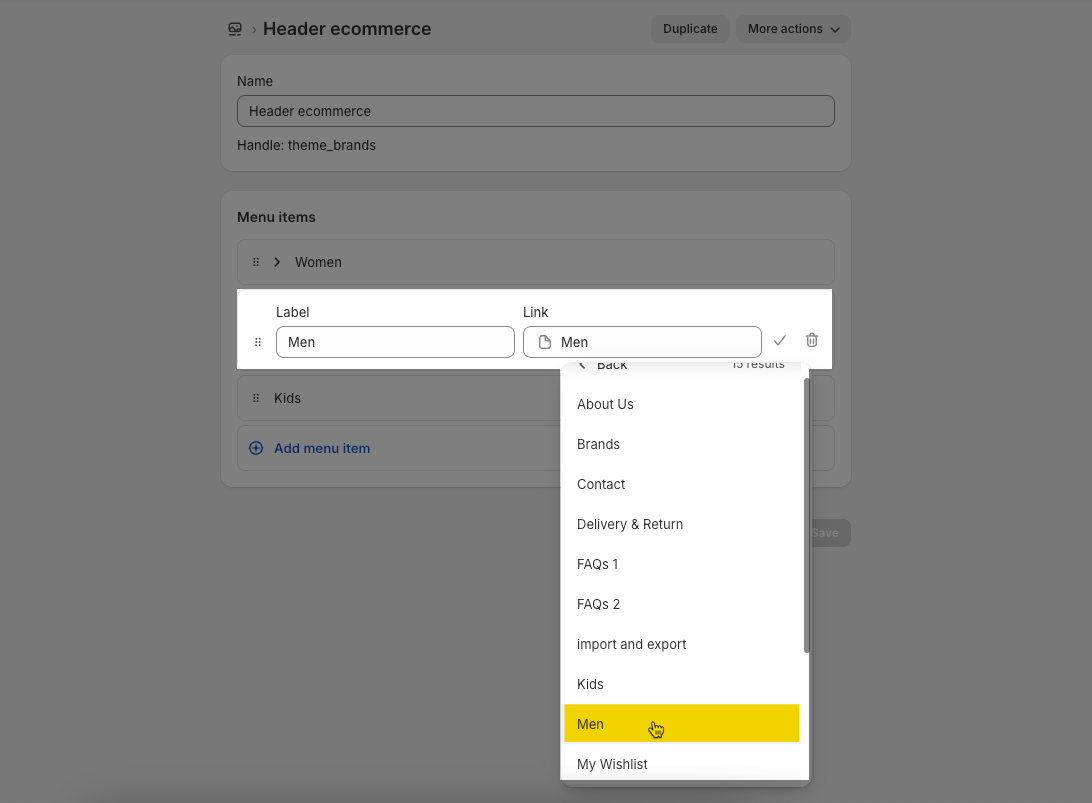
Next, you connect Level 1 items with the corresponding pages.
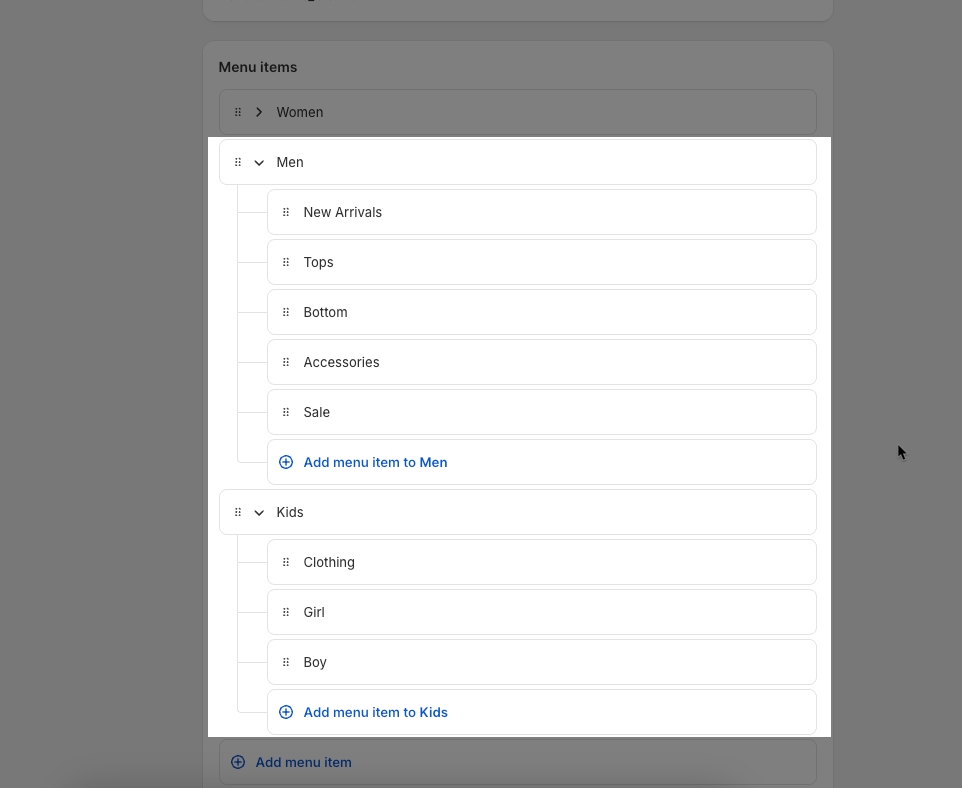
Similarly, you add the sub-menus (Level 2, Level 3) for Men and Kids. This is an example:
By default, Level 2 shows a link or dropdown (if the Level 2 has submenu - Level 3).
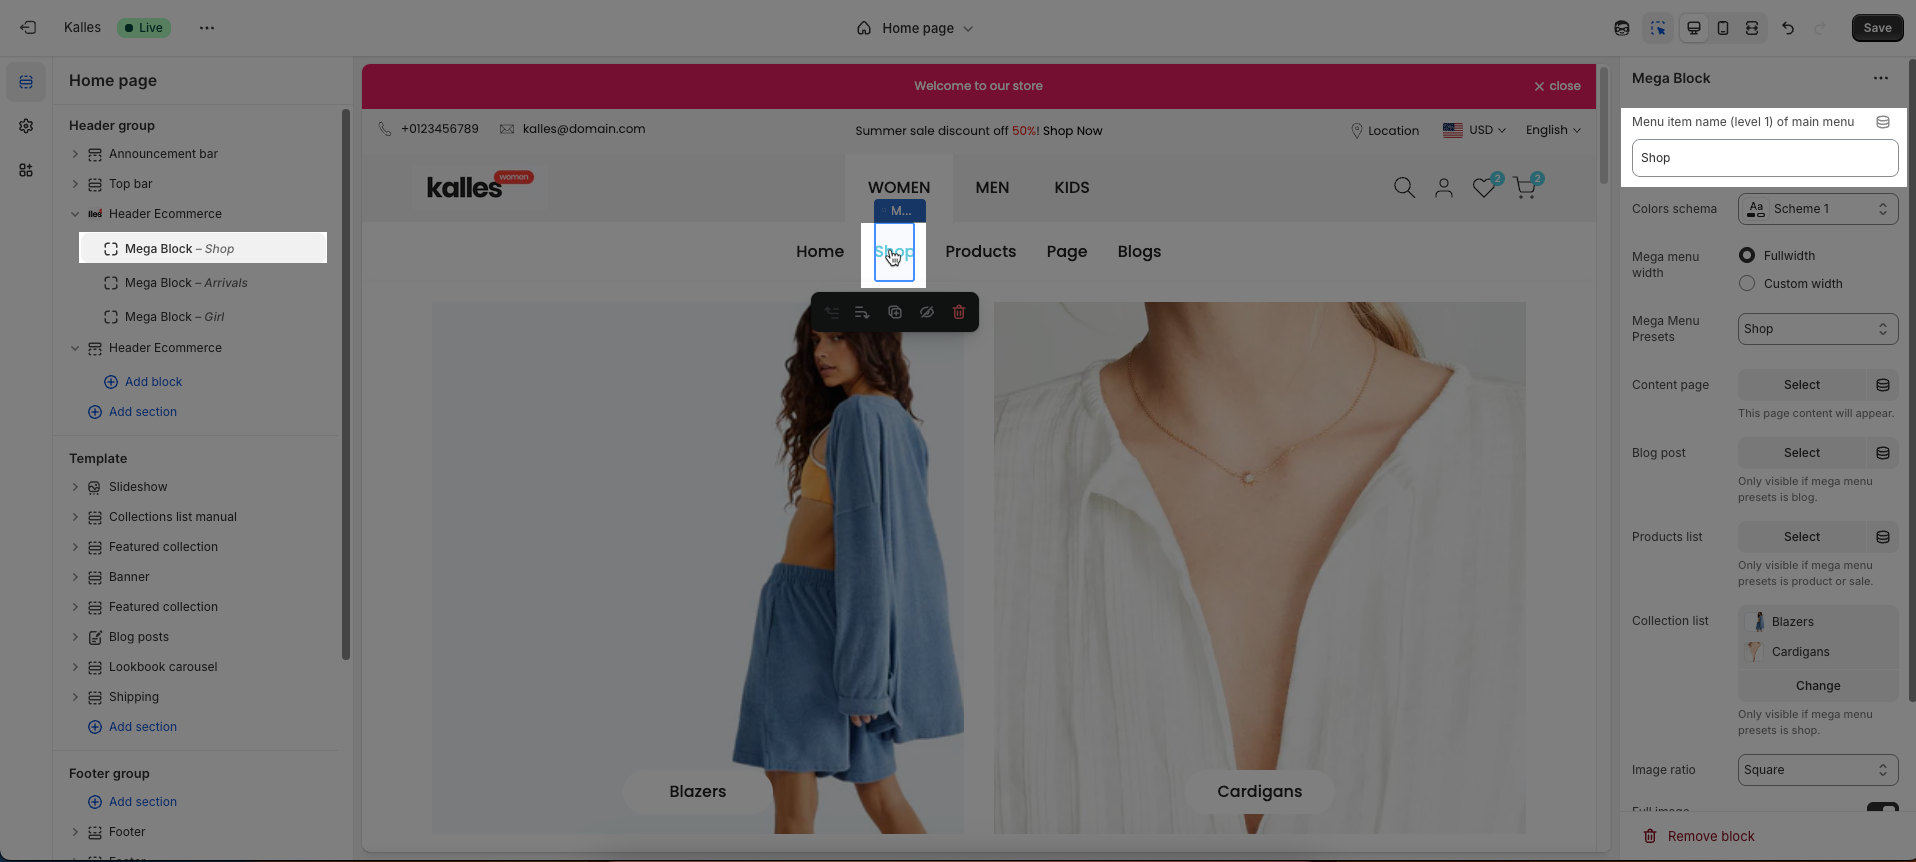
To show a megamenu for Level 2, you add "Mega menu block" and connect it with the key: "Level 1 - Level 2". There are 7 types of Mega menu blocks, you check this document.
Example: Women - Shop, Men - Arrivals, Kids - Girl
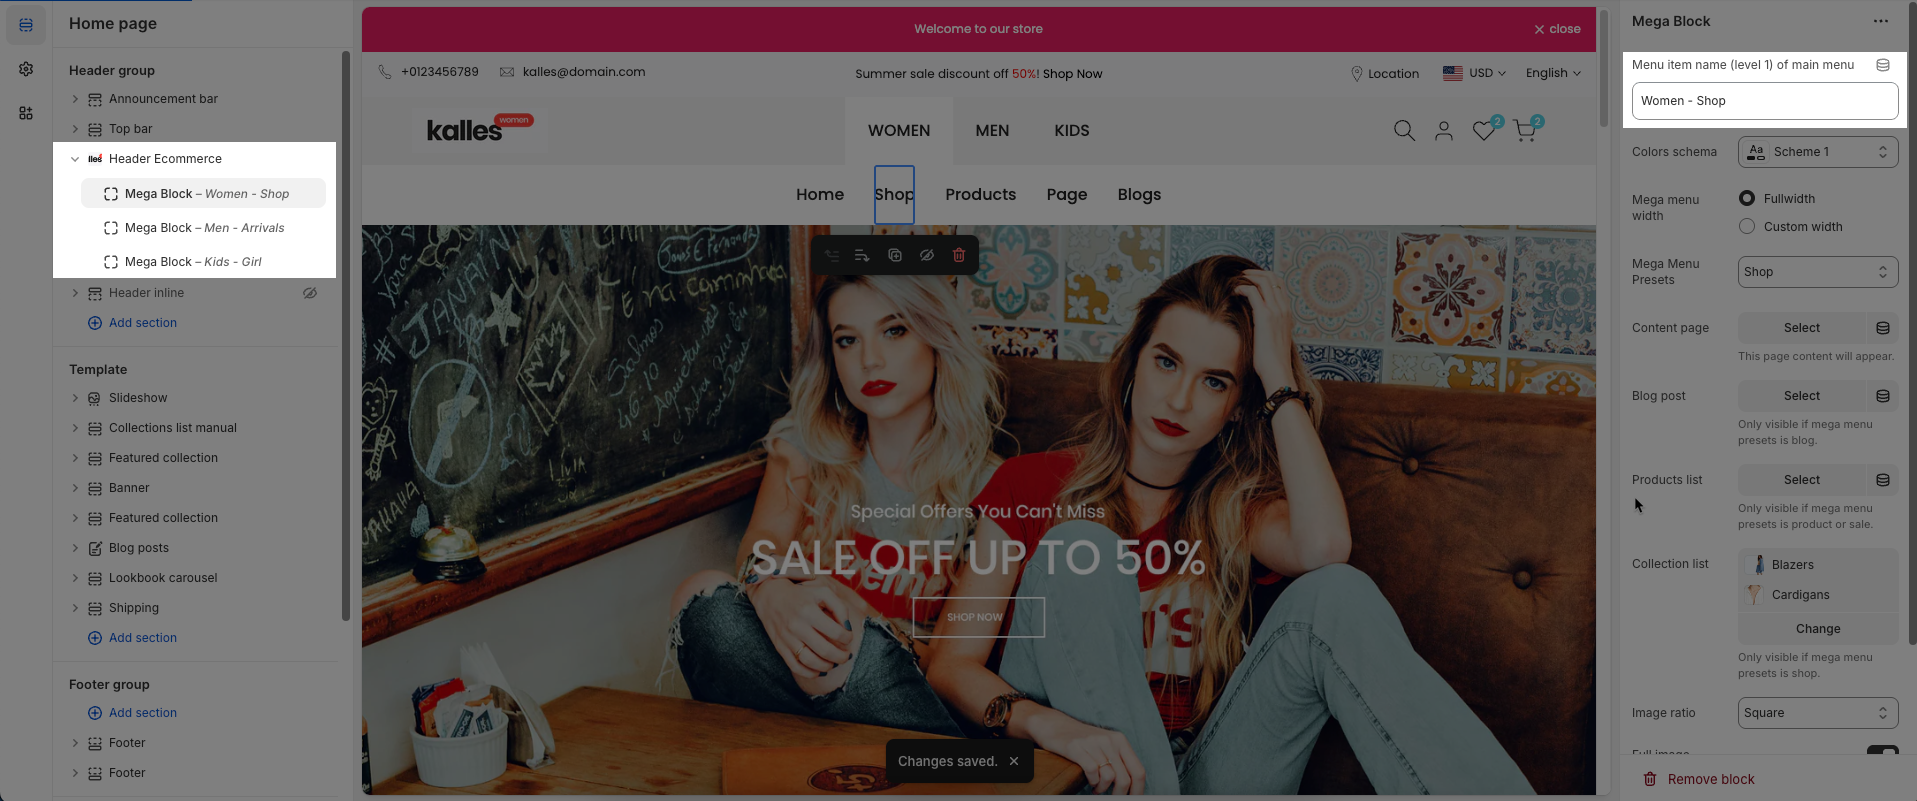
Important note: the Menu names must be the same as Page title.

Step 1: Go to Content > MetaObject > Add definition
Required name: Brand
Follow this video:
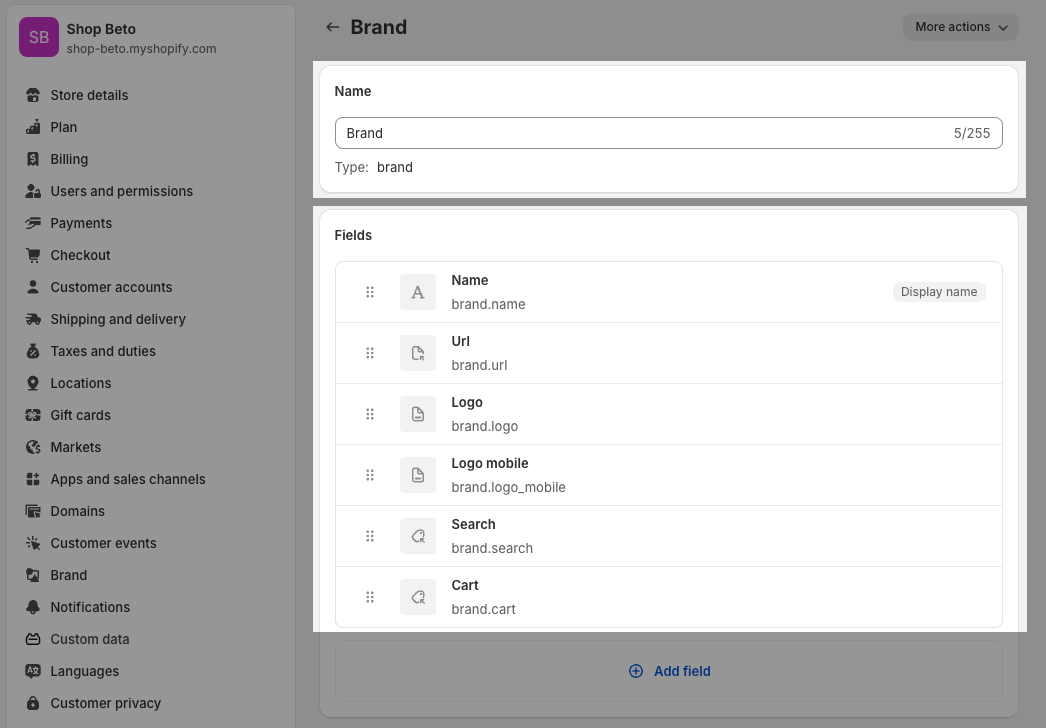
Step 2: Click 'Add fields' > choose the Type first. You will add at least 4 fields:
Name => Single line text
Url => Page
Logo => File
Logo mobile => File
Search => Product > List of products (You will create this field if you want search product suggest have different for each Brand Page)
Cart => Product > List of products (You will create this field if you want product suggest in the cart have different for each Brand Page)
Follow this video:
After creating all the fields you need, you will get a MetaObject with fields:
Note: No need to create an entry for WOMEN (default homepage).
Go to Content > MetaObject > open "Brand" > Add entry. Please follow this video:
This step connects "page, logo, search, cart" you created in step 3 to the live page.
This feature will work as follows: if you add references to products, collections, page, blogs, or blog posts on a specific Brand Page, when you click on them, this component will remain on that page.
Reference elements included:
Pages => for Logo: different logo and mobile logo for each brand page.
Products => for search, cart suggest products.
Collections => when you click on these collections/ products in these collection, it will remain on the same brand page.
If you don't add a reference to it, it will default to the Brand Page Default (Home page).
You will connect for Product, Collection, Page, Blogs or Blog posts similar the example below.
Step 1: Create Metafield (Pages)
Go to Settings > Custom data > Pages > Add definition
Name: Brand
Key: theme.brand
Content type: Metaobject
Reference: Brand
Please follow video below:
Step 2: Select Entry for Pages
Result: The logo, search suggestion, cart suggestion change when you select different brand pages. Please check this video:
Result: The logo, search suggestion, cart suggestion change when you select different brand pages
Note: If your collections connect with Brand page; you can ignore products of collections. It assigns automically for products"
"The priority level is from inside out: if you have created a metafield and selected an Entry for the Brand page within a product, the product will receive the value of Products and not receive Collections. Similarly, it will prioritize Blog Posts first, then Blogs.
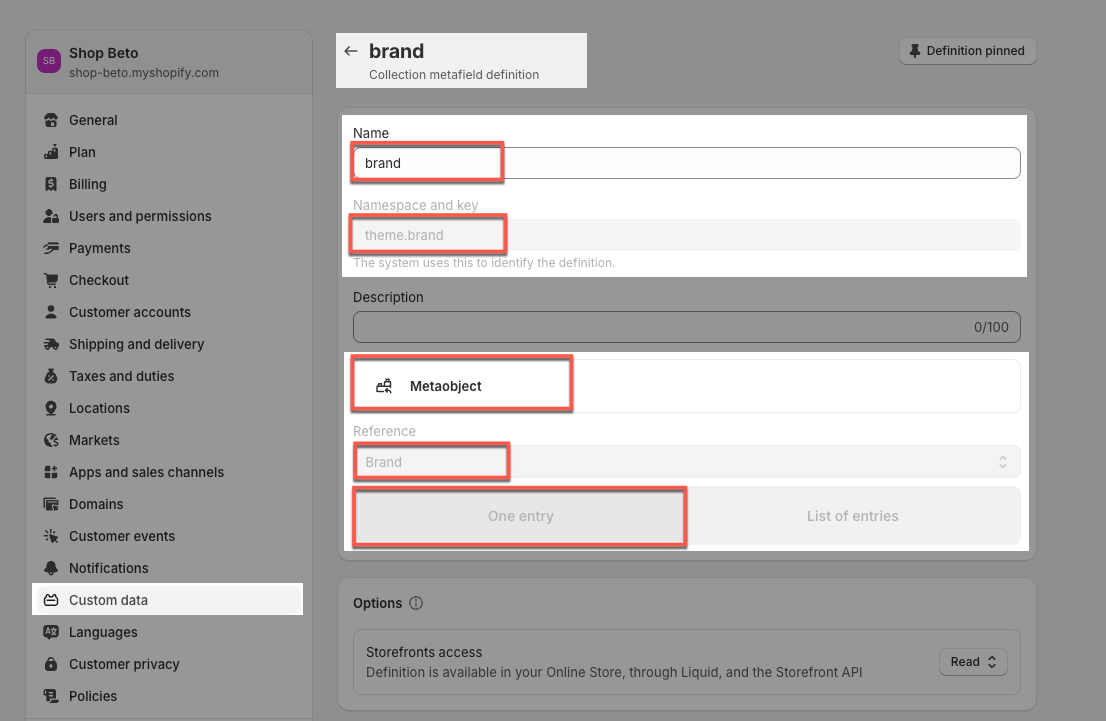
Step 1: Create Metafield (Collections)
Go to Settings > Custom data > Collections > Add definition
Name: Brand
Key: theme.brand
Content type: Metaobject
Reference: Brand
Step 2: Select Entry for Collections
You can follow this video to connect a collection to a brand page. Example, I connected "Men 3" to "MEN" brand => Video guide 1
Then all products in "Men 3" will connect to MEN brands too => Video guide 2
In the "Header brands Kalles" Navigation, a URL collection cannot be in two brands. For example, if you put the "Men 3" collection under both WOMEN and MEN brands, the WOMEN brand will be activated when you access the "Men 3" collection.
Result: When you access the collection page, or products page of a reference collection, the corresponding brand page will be highlighted. Check "Video guide 2" above.
We prioritize the top first section header to show. Please delete header sections that you do not use.
Header by brand: If you choose header by brand, you can add multiple header sections, and each section will correspond to 1 brand.
Brand name: Enter the brand name (Example: Women)
Enter the brand name to be used in the mega menu. Leave blank to determine this is the default header section
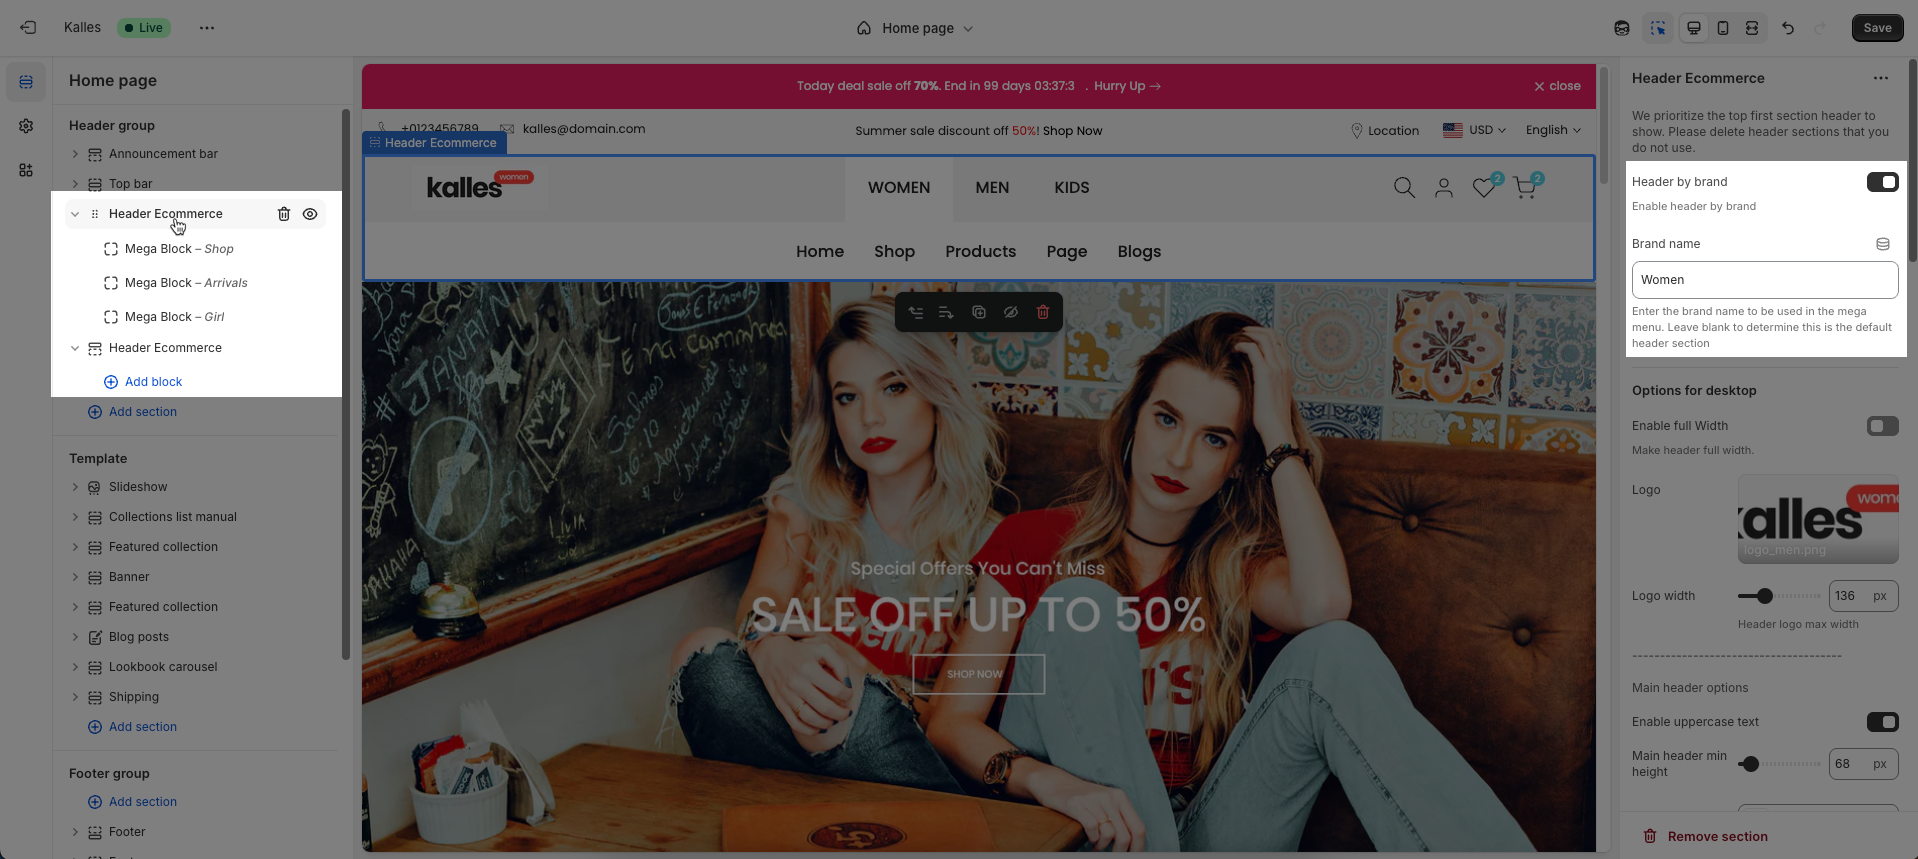
If enable Header by brand, to show megamenu for Level 2, add "Mega Menu Block" and you don't need to connect it to the key: "Level 1 - Level 2" but just connect to the level 2 key
5.1.1. Options for desktop
Enable full Width: Check to enable full width for the header.
Upload your logo image file & Set the width of the logo (in pixels).
Main header options
You can Enable uppercase text, set the Main header min height on desktop, and select the color schema for the header
Group icons options. Only work on desktop
Show or hide User & Wishlist
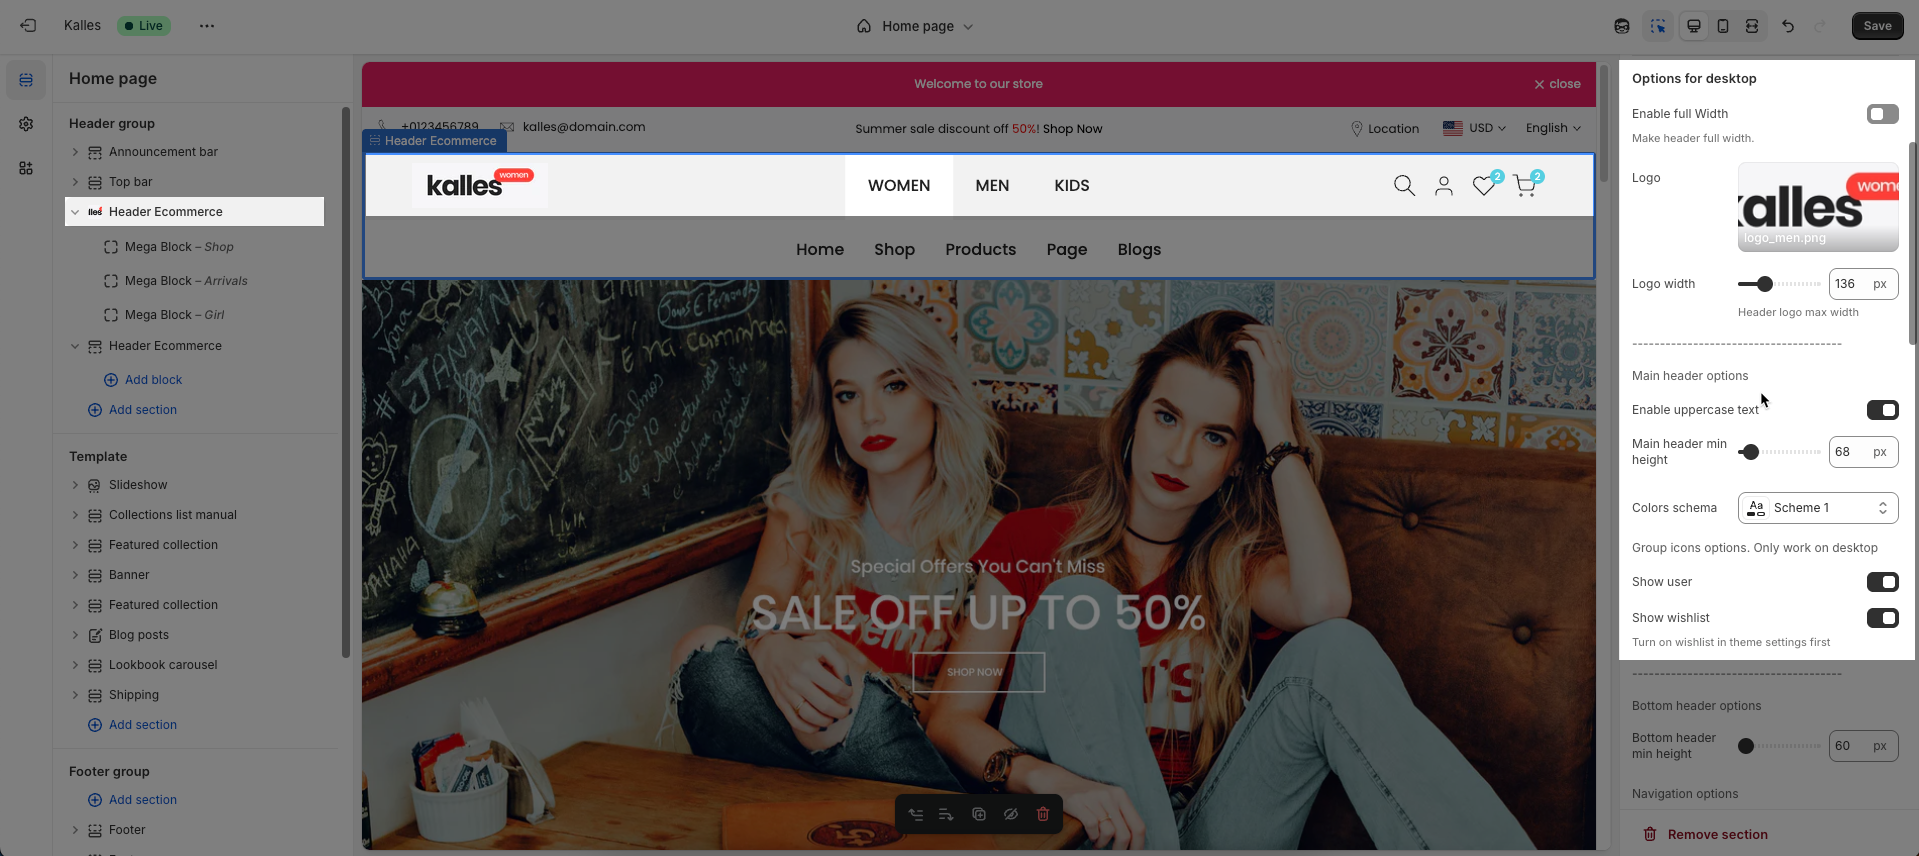
Bottom header options
Bottom header min height: Set the minimum height of the bottom header on desktop. This affects the vertical space the header occupies on the page.
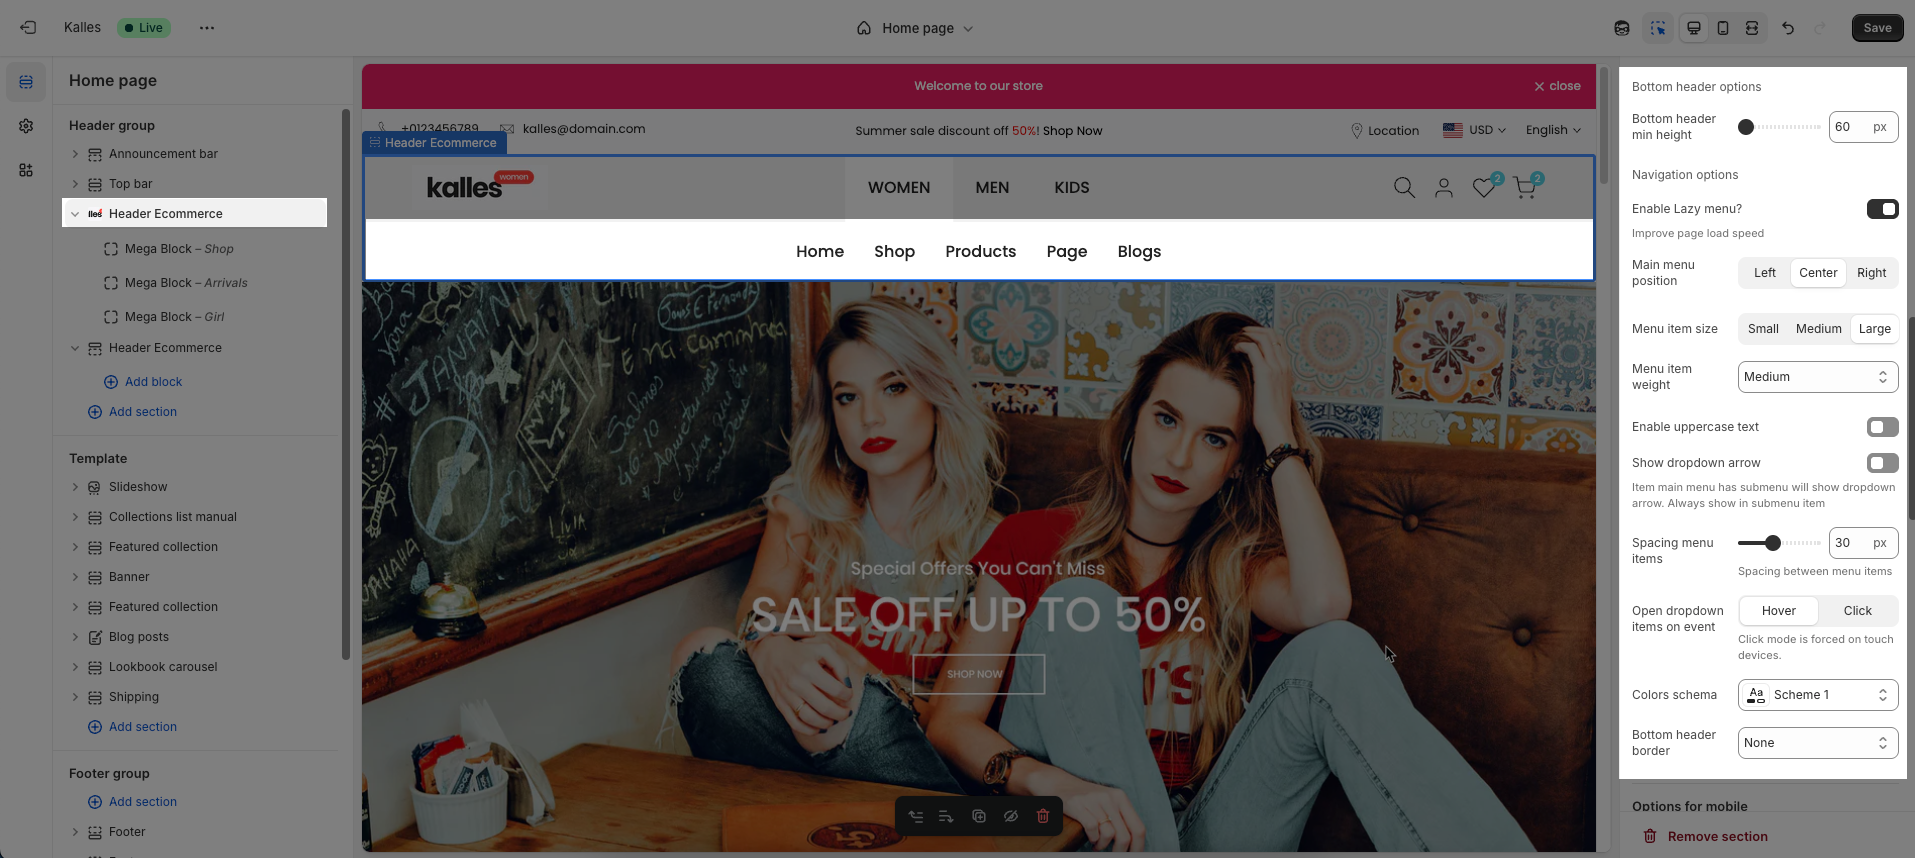
Navigation options
Enable Lazy menu?: Enable this option to lazy load the menu. This improves initial page load speed by only loading parts of the menu when they are needed
Main menu position: Select the position of the main menu within the header. Common options include center-aligned, left-aligned, or right-aligned.
Config Menu item size & Menu item weight
Enable uppercase text: Enable this option to transform all menu item text to uppercase.
Show dropdown arrow: Display a dropdown arrow icon next to main menu items that have submenus. This arrow will always be shown on submenu items.
Open dropdown items on event: Select the event to open dropdown menu items (on hover or click).
Spacing menu items: Set the horizontal spacing between main menu items.
Open dropdown items on event: Select the event to open dropdown menu items (on hover or click).
Colors schema: Select the color schema for the bottom header.
Bottom header border: you can choose None, Border top, Border bottom, Border top & bottom
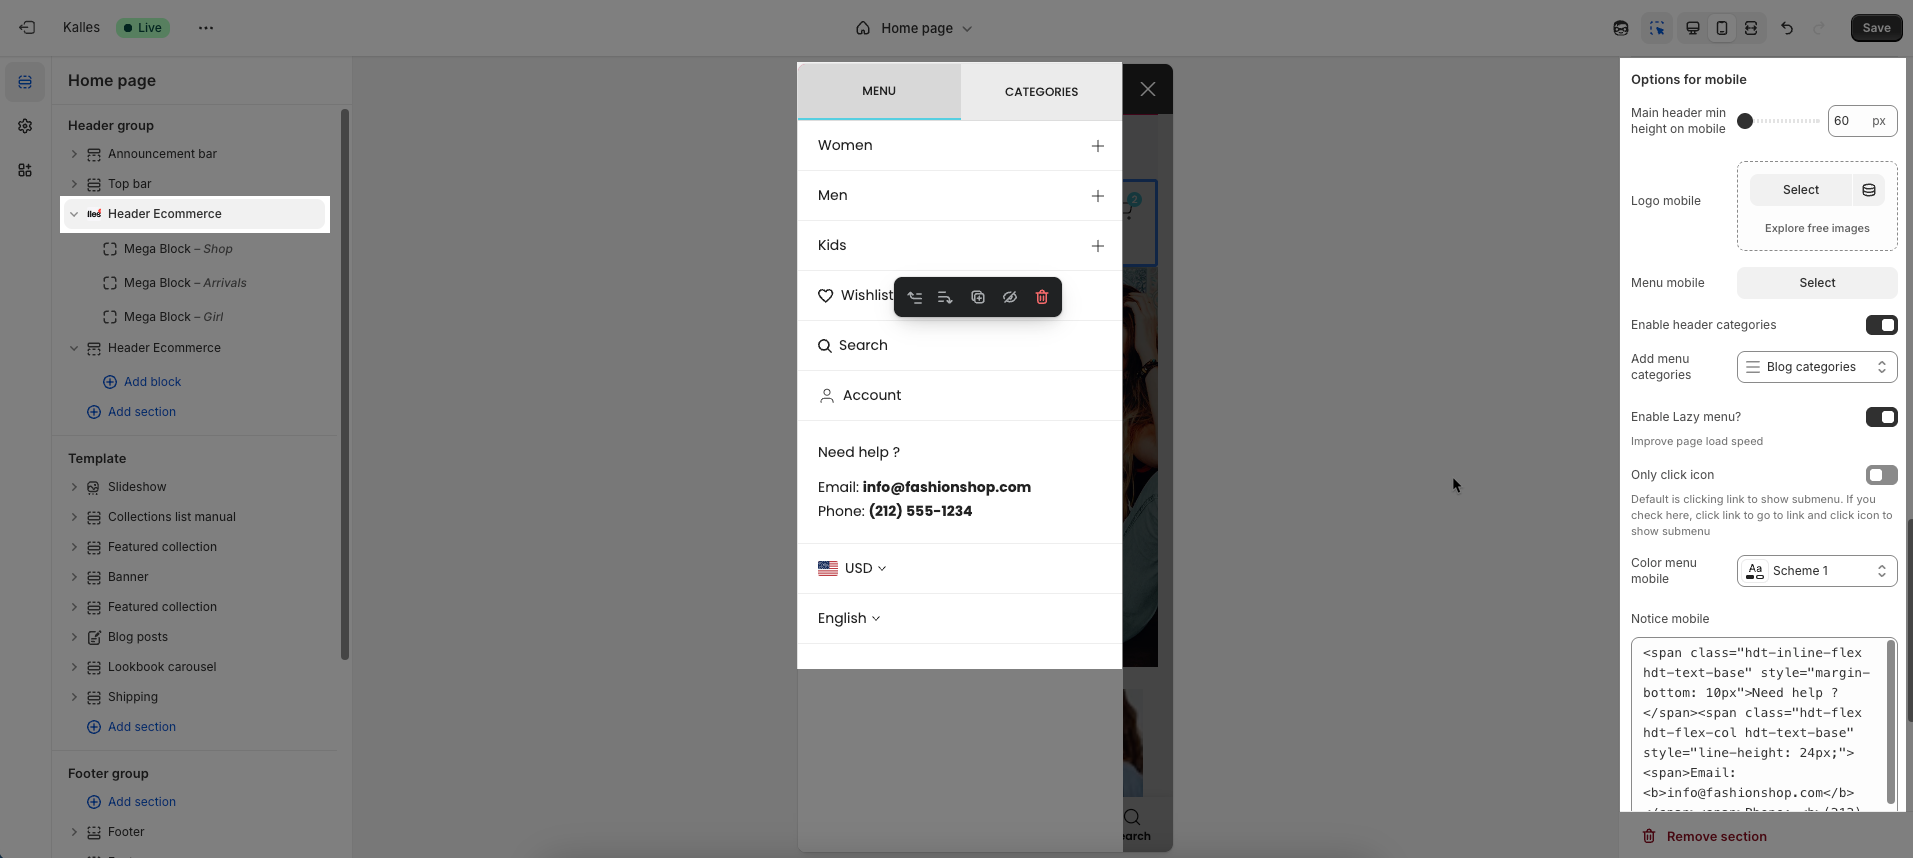
5.1.2. Options for mobile
Main header min height on mobile: Set the minimum height of the header on mobile devices.
Logo mobile: Upload a separate logo image file specifically for mobile devices (optional). Use a logo optimized for smaller screens or a brand icon if desired.
Menu mobile: Select the navigation menu to be displayed when users access the website from a mobile device.
Enable header categories: Enable this option to display product categories directly in the header
Add menu categories: Select the list of collections or categories to be displayed when 'Enable header categories' is active.
Enable Lazy menu?: Enable this option to lazy load the menu on mobile devices. This improves initial page load speed by only loading parts of the menu when they are needed
Only click icon: When enabled, only clicking the arrow icon will expand a submenu; clicking the menu item text will navigate directly to the linked page.
Color menu mobile: Select the color schema for the mobile menu when it is open.
Notice mobile: Enter a short notification text to be displayed at the top of the mobile menu
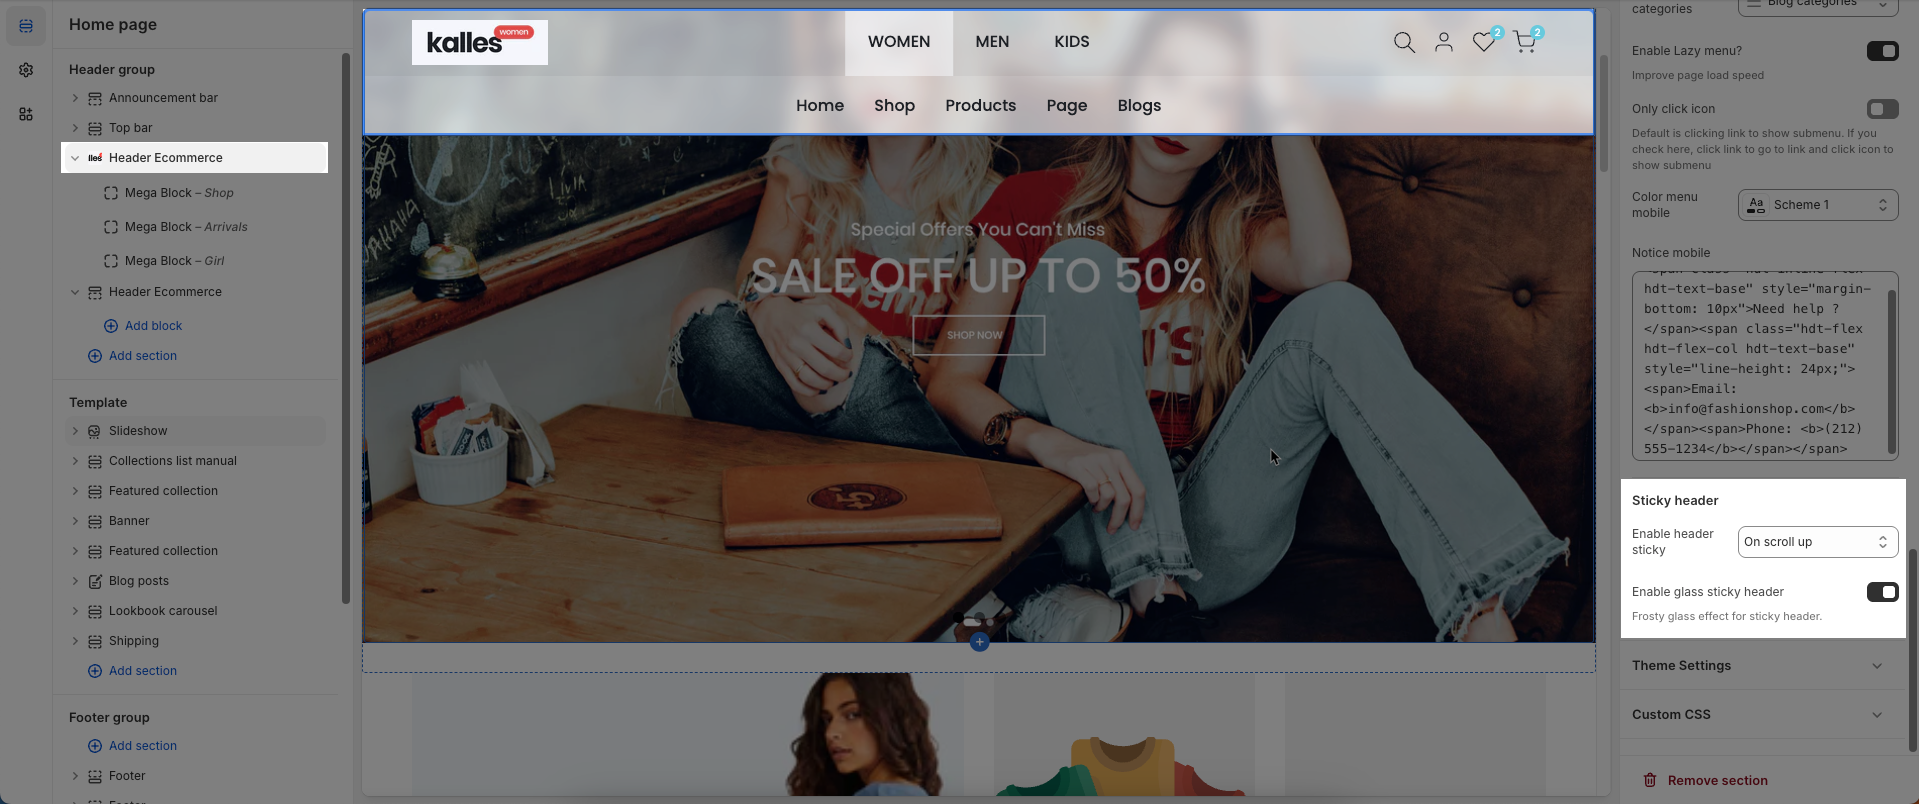
5.1.3. Sticky header
Enable header sticky: Select the behavior of the sticky header when scrolling.
On scroll up: The header reappears only when the user scrolls upwards.
Always: The header remains fixed at the top of the page after scrolling down a certain distance.
None: The header does not stick (it scrolls out of view).
Enable glass sticky header: Enable this option to apply a "glassmorphism" effect to your sticky header.
Frosty glass effect for sticky header.
Follow this Guide